
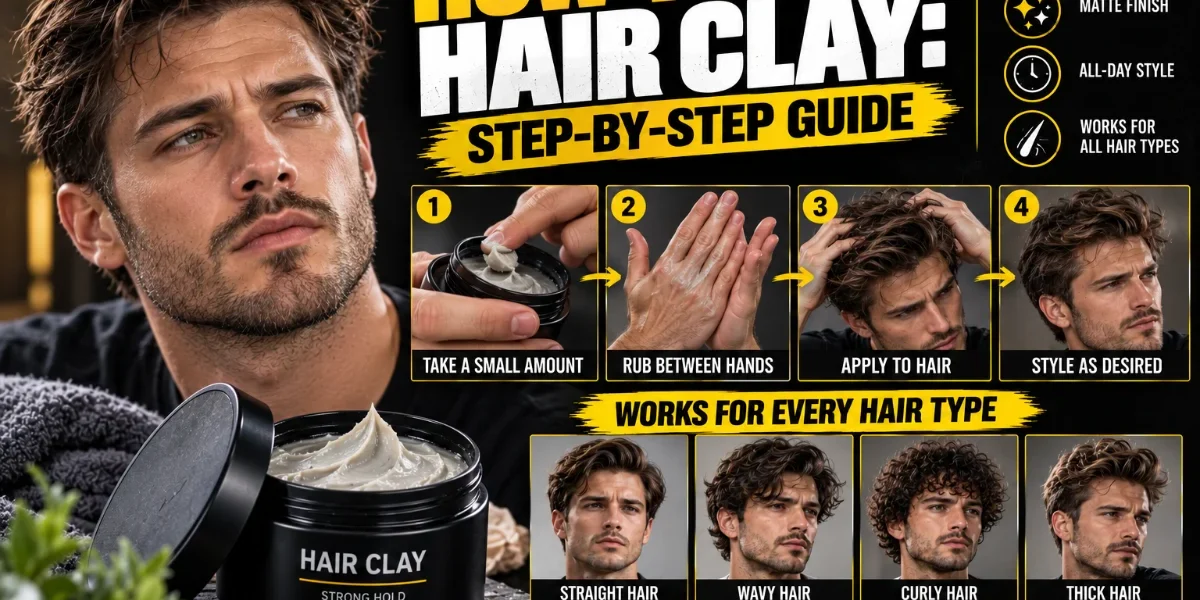

Quick Answer: Scoop a pea-sized amount. Rub between your palms for a full 15 seconds until translucent and smooth. Apply to towel-dried or dry hair from the back of the head forward, working from roots upward with spread fingers. Shape with your fingers for texture or a comb for structure. Do not touch for five minutes while it sets. Clay gives a matte finish with volume and grip, not shine.
Hair clay is the product most men reach for and most men use incorrectly. In the shop, I watch clients scoop a blob out of the jar, slap it onto dry hair from front to back, and wonder why it clumps at the hairline and leaves the rest unstyled. The product works. The technique has a narrower margin for error than pomade, gel, or wax, because clay relies on physical particle interactions rather than chemical hardening. Small mistakes create disproportionately bad results.
Below is the technique that makes clay work: the emulsification, the direction, the amount, and the five-minute rule that most men skip.
What Is Hair Clay?
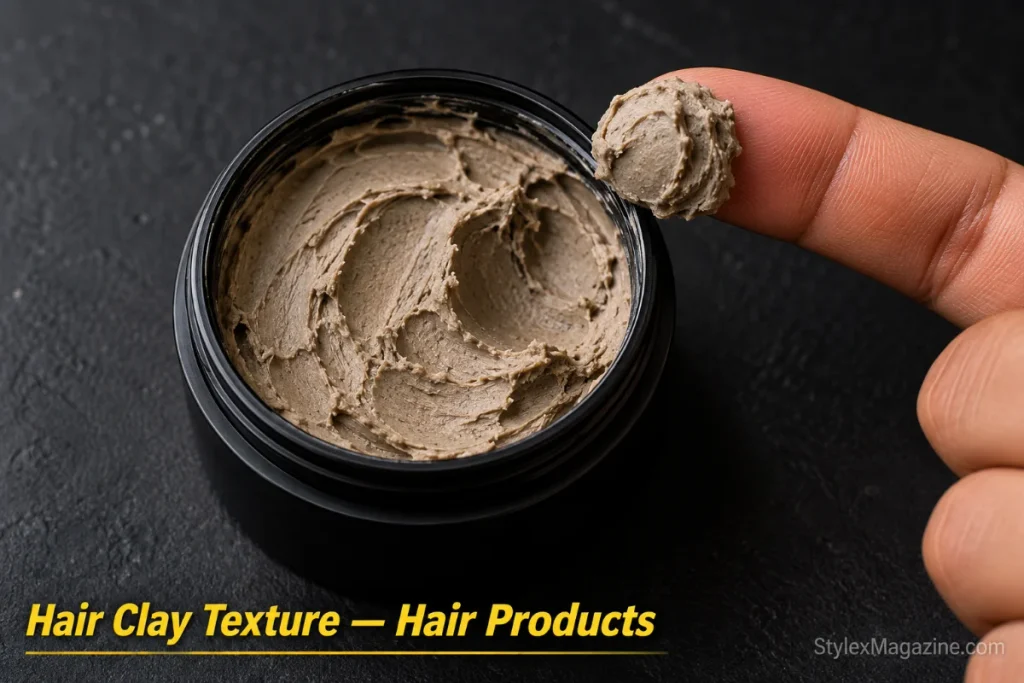
Hair clay (also called styling clay or molding clay) is a styling product built on mineral ingredients (typically bentonite and kaolin) that delivers a matte finish with medium-to-strong hold. It absorbs excess oil from the hair, adds gritty texture and volume, and stays pliable enough to rework throughout the day without washing out and starting over.
How clay differs from other products:
| Product | Finish | Hold | Reworkable | Best For |
|---|---|---|---|---|
| Clay | Matte, natural | Medium-strong | Yes | Textured, voluminous, casual styles |
| Pomade | Shine to high shine | Medium-strong | Yes | Polished, slick, classic styles |
| Gel | Wet-look shine | Strong, stiff | No (sets hard) | Slick backs, spikes, hold in humidity |
| Wax | Low shine | Light-medium | Yes | Natural movement, light hold |
For the full pomade breakdown and when to choose it over clay, see the how to use pomade guide. For the strongest defined hold that locks on contact, see the how to use hair wax guide.
How Do You Apply Hair Clay Step by Step?
Step 1: Start with towel-dried or dry hair. Clay works on both, but each gives a different result. Damp hair (about 80% dry) distributes the clay more evenly and gives a softer, more natural hold. Fully dry hair gives stronger grip and more pronounced texture. For textured crops and messy styles, go dry. For quiffs and flowing styles, go damp.
Step 2: Skip the conditioner. Conditioner coats the hair with silicones and smoothing agents that prevent clay from gripping. On days you plan to use clay, wash with shampoo only and skip conditioner entirely, or condition only the bottom two inches of hair below ear level. This single adjustment makes more difference than any application technique.
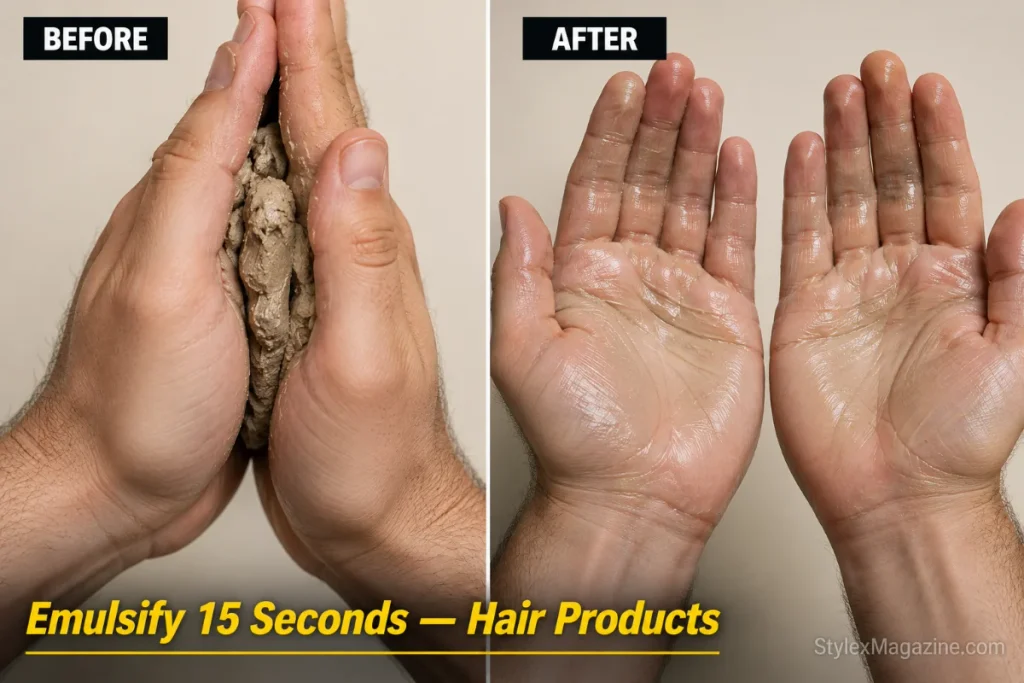
Step 3: Scoop and emulsify for a full 15 seconds. Scoop a small amount (see the next section for exact quantities). Rub vigorously between your palms for 15 seconds until the product changes from thick and opaque to thin and nearly transparent. Clay contains beeswax that only softens with sustained warmth from your hands. Cut this step short and the undissolved wax creates visible clumps in your hair.
Step 4: Apply with fingers, back to front, roots up. Insert your spread fingers into your hair at the crown and rake through toward the front. Work from the roots upward, lifting sections as you go. This builds volume from the base rather than pressing hair flat, and it avoids dumping product at the hairline where people look at you.
Step 5: Shape with fingers or comb. Fingers for texture (textured crop, messy quiff, tousled fringe). Comb for structure (side part, comb over, brush back). After shaping, use your palms to smooth flyaways and compress the final form with light pressure.
Step 6: Hands off for five minutes. Clay needs time for the moisture to evaporate and the particles to settle into their hold structure. Every touch during this window redistributes the product, creates frizz, and weakens the set. Style it once, then walk away.
How Much Hair Clay Should You Use?
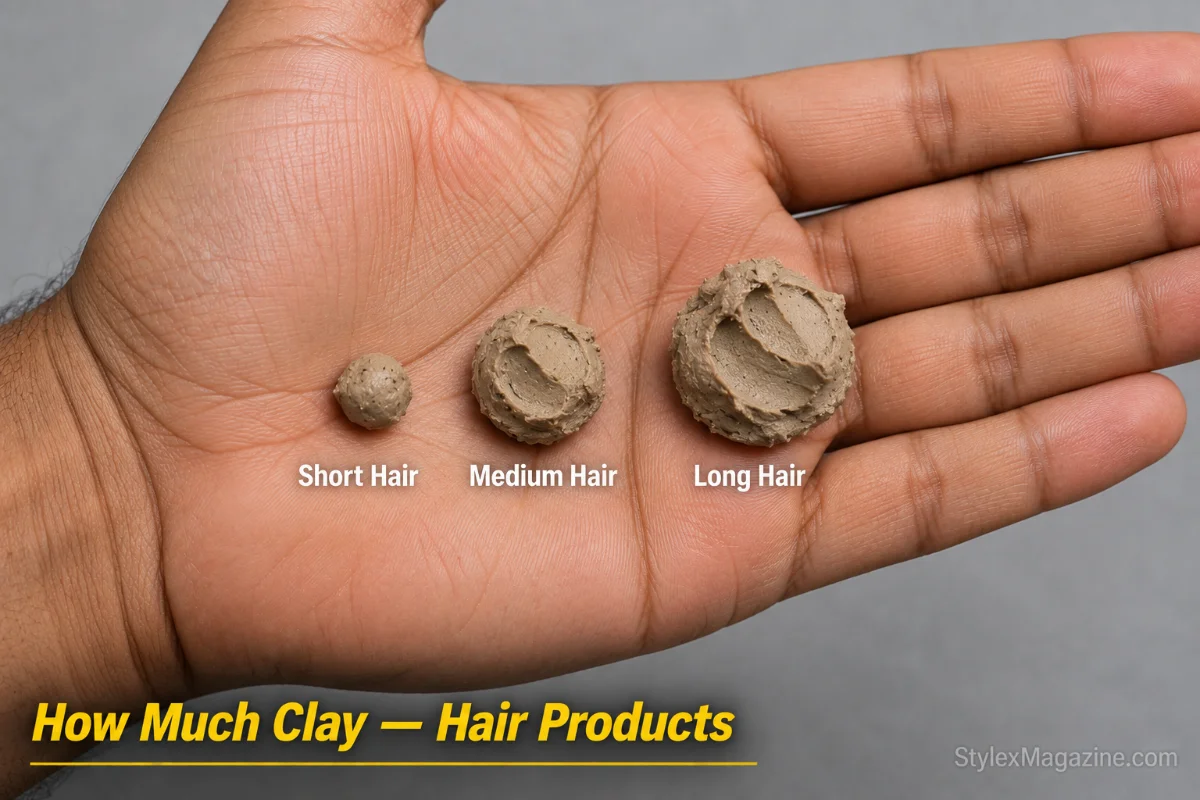
Clay concentrates as it dries. The amount that looks reasonable in your palm becomes a stiffer, heavier coating once moisture evaporates. Always start smaller than you think.
| Hair Length | Starting Amount | Second Layer If Needed |
|---|---|---|
| Short (under 2 inches) | Pea-sized | Rarely |
| Medium (2-4 inches) | Dime-sized | Half-pea at the front only |
| Long (4+ inches) | Nickel-sized | Dime at the ends |
| Thick/coarse hair | Add one size up | Divide into sections |
Two thin layers always beat one thick layer. Apply the first layer for overall coverage, shape roughly, then add a second thin layer only where hold or texture is falling short. This layering approach gives maximum control with minimum product weight.
How Do You Use Hair Clay on Different Hair Types?
Thick hair: Divide into sections and apply one section at a time. Thick hair resists distribution. Working through all at once leaves the outer layer coated and the inner layers untouched. Use a strong-hold clay and blow-dry the hair into your rough shape before applying for structured styles. Budget a dime-to-nickel amount.
Thin or fine hair: Clay is the single best product for fine hair because it adds grit, body, and the illusion of thickness without the weight of pomade or the wetness of gel. Use a pea-sized amount of a lightweight clay. Apply to dry hair only. Damp application on fine hair makes it lay flat and look thinner. Focus product on the roots to create lift.

Curly or wavy hair: Apply to damp hair with fingers only. Scrunch sections upward to encourage the curl pattern. A comb stretches curls and causes frizz. Use less product than on straight hair because curls hold shape naturally and excess clay stiffens the bounce. For the full curly styling guide, see curly hairstyles for men.
Straight hair: The most predictable type. Clay on dry straight hair creates strong texture and separation. On damp straight hair it gives a softer, more natural flow. Straight hair shows product clumps faster than any other type, so thorough emulsification is non-negotiable.
What Styles Can You Create with Hair Clay?
Clay handles textured, voluminous, and casual styles better than any other product. Here are the five most requested in the shop.
Textured Crop: Apply to dry hair, rake fingers through the top in random directions, scrunch small sections at the crown, and pinch clusters for separation. The less you fuss, the more natural it looks. For variations, see messy hairstyles for men.

Quiff: Apply to damp hair, push the front upward and slightly back with your fingers, then use a blow dryer on medium heat pointed upward at the front to lock the lift. The clay provides the grip to hold the height without gel stiffness.

Middle Part Flow: Apply a small amount to damp hair, part down the center, and let each side fall naturally. Clay keeps the curtains in place without weighing them down or adding unwanted shine. See the middle part hairstyles guide for variations.
Messy Fringe: Apply to dry or damp hair, push the fringe forward and to one side, use your fingers to break up pieces for texture. A matte clay keeps the fringe movable without it falling into your eyes.
Relaxed Brush Back: Apply to damp hair, brush backward from the forehead with your fingers, and let it settle without combing. You get a softer, more casual version of a slick back without the pomade shine.
What Are the Most Common Hair Clay Mistakes?

1. Skipping emulsification. Unemulsified clay deposits in semi-solid chunks that grab the first strands they contact and refuse to spread. You get patchy hold: stiff spots next to completely unstyled spots. You cannot fix uneven distribution after the fact. The only recovery is washing out and restarting with properly warmed product.
2. Applying with palms instead of fingers. After warming the clay between your palms (correct), many men apply it by pressing their palms against their hair (incorrect). Palms flatten and compress hair. Fingers separate and lift. Use your palms for emulsification, then switch to spread fingers for the actual application.
3. Applying clay over yesterday’s conditioner or product. Conditioner and leftover product create a slippery barrier that prevents clay from gripping hair. On clay days, start with clean hair washed with shampoo only. If you styled with clay yesterday and did not wash it out, the old layer mixes with the new one and creates a waxy, stiff buildup by day three.
4. Adjusting the style during the setting period. Clay needs five minutes of hands-off time after the initial styling. Each adjustment during this window disrupts the hold structure, redistributes product unevenly, and creates frizz. Shape it in the first 30-60 seconds, then leave it alone.
5. Using the same amount regardless of hair type. Thick hair needs twice the product of fine hair. Fine hair needs half the product of thick hair. A nickel-sized amount on fine hair creates stiff, heavy, immovable strands. A pea-sized amount on thick hair provides zero hold. Match the amount to your specific hair type and length, not to a single standard recommendation.
If your clay is not working, troubleshoot in this order: too much product (most common) → insufficient emulsification (second most common) → wrong dampness level (third). Fixing the top two alone solves most clay complaints.
FAQs
Can you use hair clay on long hair?
Clay works on hair up to about 5-6 inches. Beyond that length, the hold may not reach the ends, and the matte finish can make long hair look dry. For long hair, apply only to the mid-lengths and ends for texture and separation, keeping the roots clean. If you need hold from root to tip on long hair, pomade or a cream is a better choice.
Does hair clay expire or go bad?
Most clay products last 12-24 months after opening. Clay that has dried out, crumbled, or separated into oil and solid layers has gone bad. Dried-out clay does not emulsify properly and creates chalky, uneven results. If your clay has hardened in the jar, adding a few drops of water and kneading it can sometimes restore the texture, but if it crumbles or smells off, replace it.
How do you wash hair clay out?
Shampoo and warm water. Clay is harder to remove than water-based pomade but easier than oil-based pomade. Lather the shampoo into the hair before adding water to break down the clay particles. If one wash does not remove it completely, repeat. Use a clarifying shampoo once a week to clear accumulated buildup.
Can hair clay damage your hair?
Clay itself does not damage hair. The mineral ingredients (bentonite, kaolin) are inert and non-reactive. Damage comes from leaving clay in without washing for days, which traps dirt against the scalp and can cause irritation or clogged pores. Wash it out before bed or at least every other day.
Can you use hair clay without a blow dryer?
Absolutely. A blow dryer is optional, not required. For textured crops, messy fringes, and tousled styles, apply clay to dry or damp hair, shape with your fingers, and skip the dryer entirely. A blow dryer only becomes useful when you need directional volume (quiff, pompadour) or when you are pre-shaping thick hair before applying clay. Most men who use clay daily never pick up a dryer.
Can you use hair clay and sea salt spray together?
A strong combination. Apply sea salt spray to damp hair first as a pre-styler for added grit and texture, then blow-dry into shape, then apply clay on top for hold and definition. The salt spray creates a rough base that gives the clay more surface area to grip. You get stronger texture and more volume than either product achieves alone

Other Articles

How to Use Sea Salt Spray: Step-by-Step Guide for Texture and Volume
How to Use Pomade: Step-by-Step Guide for Every Hair Type


[…] other product in your kit gives you time. Pomade stays pliable for hours. Clay firms up gradually over five minutes. Sea salt spray needs to air dry before it activates. Wax does […]
[…] it separates them. That’s why you can’t replicate this effect with a small amount of matte clay at the roots. Different mechanism […]
[…] seen this mistake in the chair repeatedly. A client with fine hair and a clean side part uses a matte clay and ends up with hair that looks stringy rather than defined. A lightweight pomade or […]
[…] Clay carries wax for hold and clay minerals that absorb oil, so the surface turns matte and the hair feels thicker than it is. Step-by-step technique: how to use hair clay. […]